
Edge Cloud's Online Scheduling
Published by Michelle Haupt on
Edge Cloud’s Online Scheduling feature allows prospective patients to book an appointment with you directly from your website. With just a few set up steps, you can have your patients on their way in no time. In order for Online Scheduling to function, grid templates need to be classified. If you need assistance classifying your grids, check out the Schedule Setup and Design Visual Help video.
Setting Up Your Editors
There are several editors that will need to be set up, or modified before you can begin using Online Scheduling.
Offices Editor – In this editor, you can add your company’s logo. Under the Logo heading, use the browse icon to locate the logo. Use the copy button to use this logo for each additional location. Alternatively, use a different logo in each location.
Scheduler Templates Editor – Each template needs to have the correct time zone selected. These should be already set to your current time zone, but it should be checked before enabling Online Scheduling.
In addition, each template needs to have the chairs assigned to an office. To do this, select the template you wish to work with and click the Edit Grid Template button. This opens the Grid Template Editor. Click the Modify Chair button in the Edit Layout tab of the ribbon bar, and use the drop down to select the appropriate office for each chair. Save the template.
Once you are back in the Scheduler Templates editor, select the Reclassify Chairs button; the Reclassify Scheduler Templates dialogue appears. Click the checkbox next to Office and select Start. This will add the office location to each chair for all future uses of this template.
Online Scheduling Editor – The Setup tab is where you enable Online Scheduling. By default, this will be set to off. You can enable Online Scheduling for all office locations, or only certain locations.
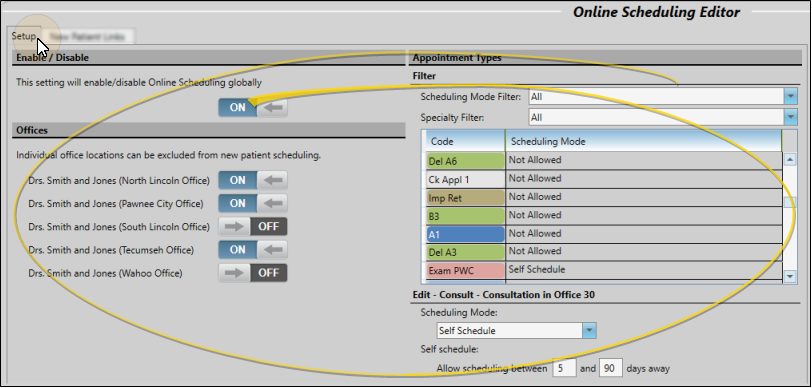
By default, each procedure under Appointment Types in this tab will be set to Not Allowed. To view your procedure list, select Not Allowed in the Scheduling Mode Filter. Find the procedure that prospective patients can schedule online, and use the drop down menu to select Self Schedule. Use the fields below the Appointment Types to set the number of days out a prospect can schedule an appointment.
The New Patient Links tab creates the links you will use to add the Online Scheduling options to your website. The list of procedures you have chosen as self-schedule in the Setup tab will be listed in this tab. Select the procedure you wish to work with. You have the option to select the specific office and/or doctor the procedure is linked to, as well as a color theme.
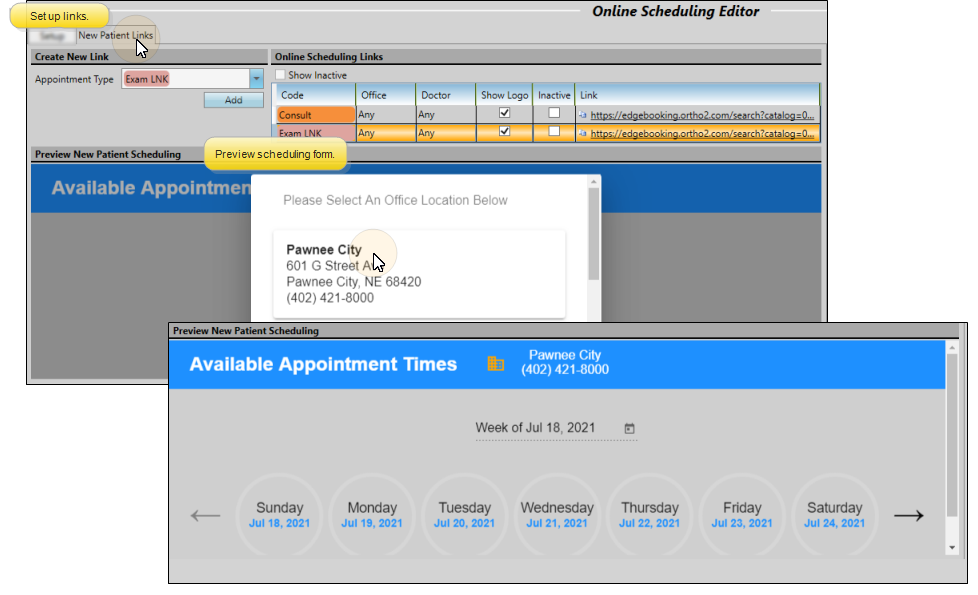
Click Add to generate a link. This link will be stored in this tab. The link will remain the same even if you later go back and change the options for the procedure (i.e. which doctor/office the procedure is for). Links can also be inactivated.
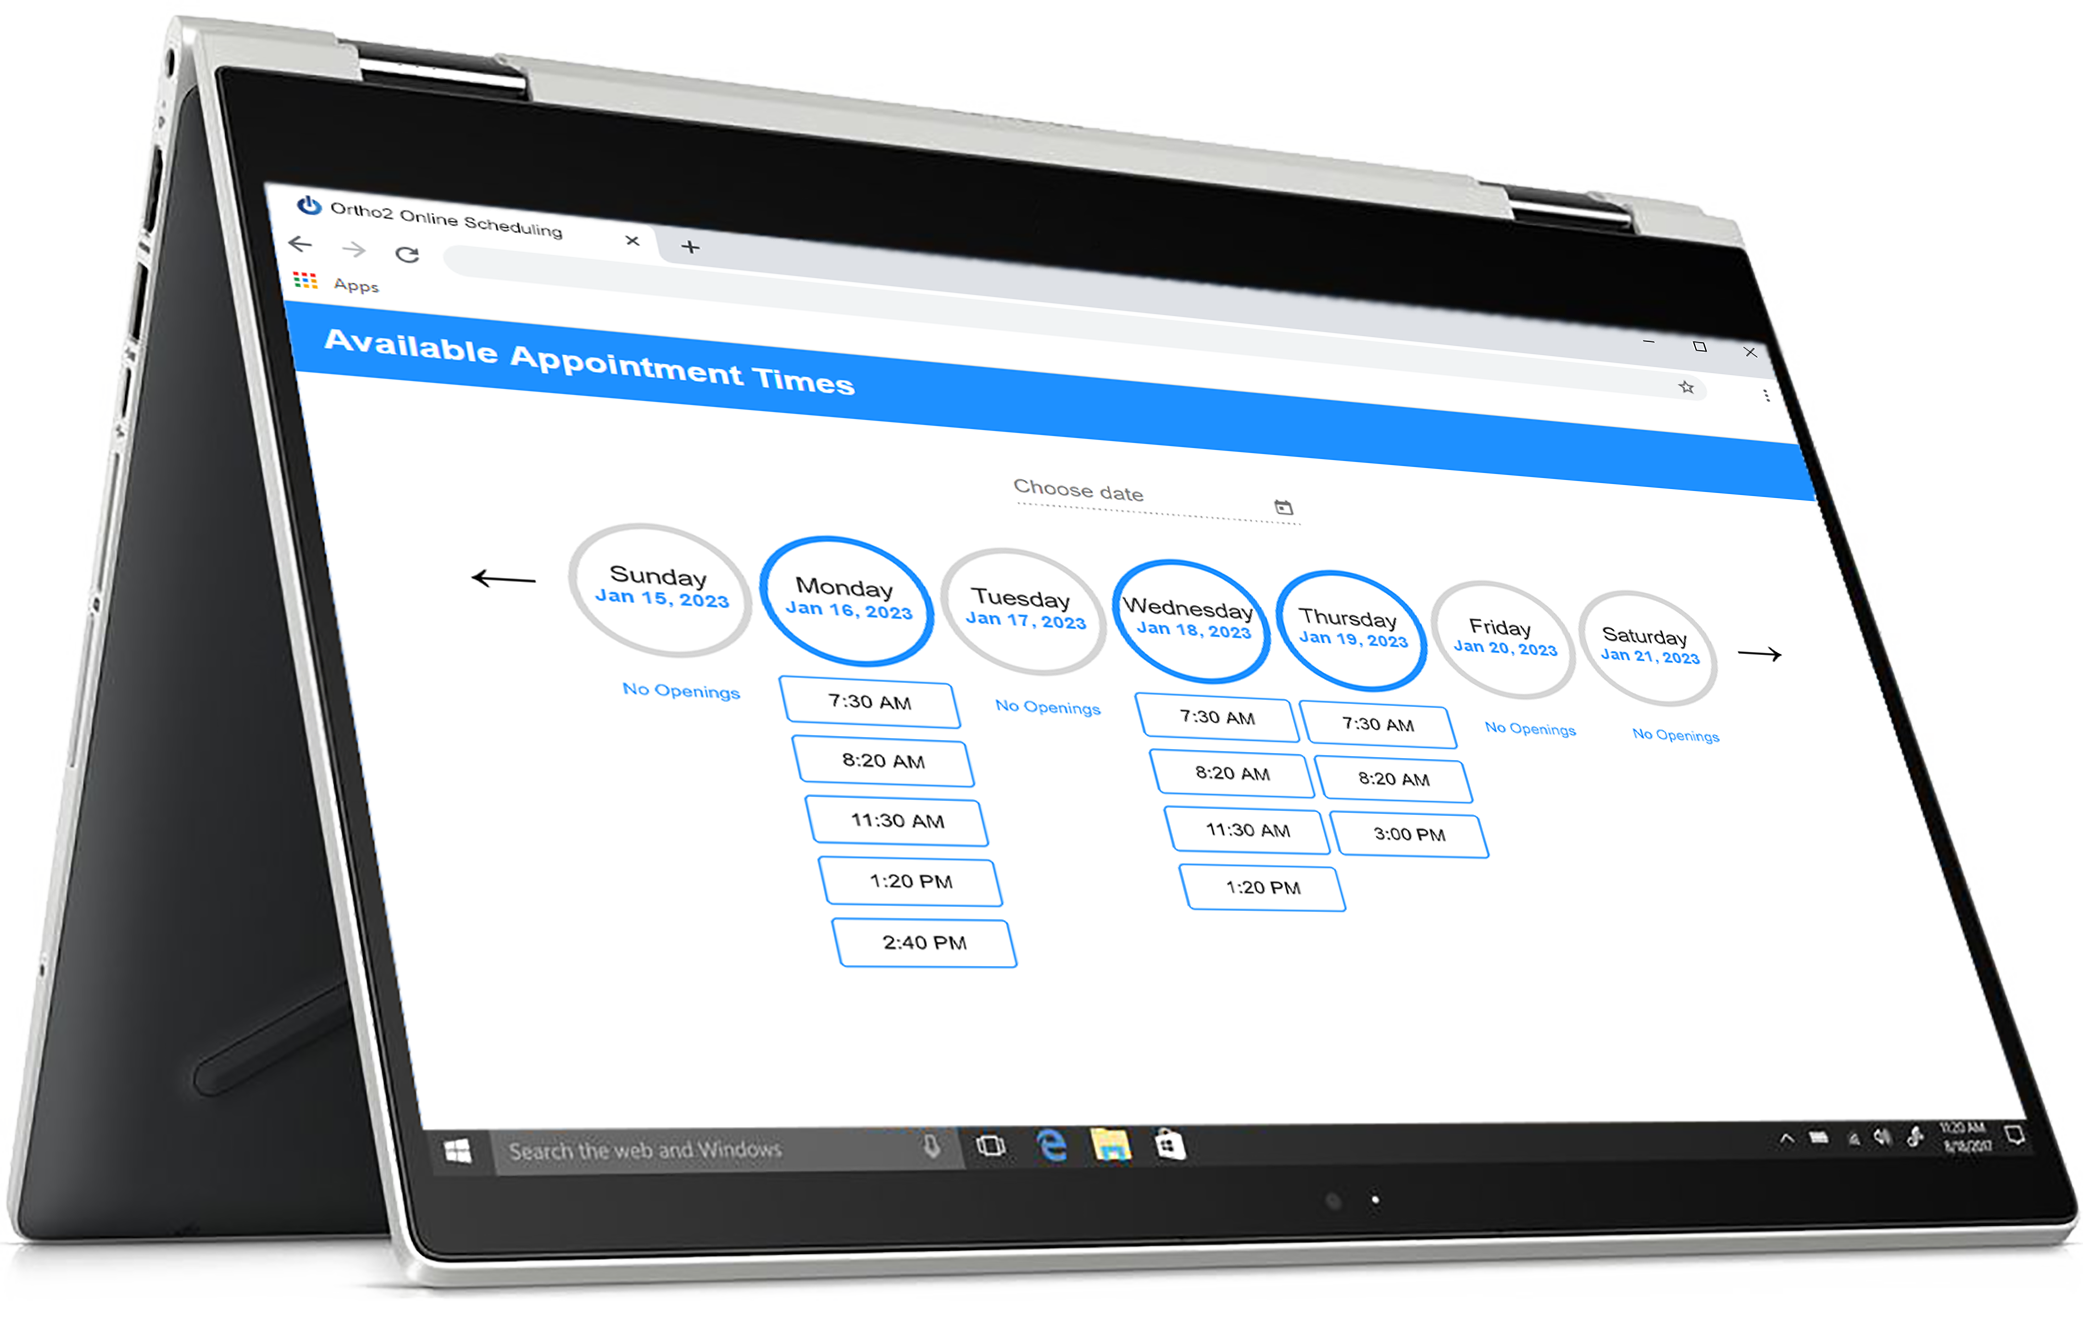
Using Online Scheduling Once your editors are set up, use the link(s) created in the Self Schedule Links tab of the Online Scheduling editor to add Online Scheduling to your website. Talk to your website developer about different options on how it can be added to your website.
Prospective patients can now select an appointment from your website to schedule. If you have more than one office location, and didn’t assign an office when creating the self-schedule links, the prospect will be asked which office they are scheduling with before they can select a time.
Once the appointment is selected, prospective patients fill out a brief form, and the appointment will be added to your scheduler. Prospects have five minutes to complete the form, or add additional time to do so. Appointments that are being booked online will not appear in the Smart Scheduler when you are scheduling simultaneously in the office. Prospects will receive an email confirming their appointment after the form is completed.
Prospects who use Online Scheduling are considered pending – meaning they don’t have a patient record yet. In addition, there is an extra icon in the Scheduler indicating the appointment was scheduled online.
Right click on the appointment in the scheduler and click Convert to Full Patient to bring up the Edit Pending Patient window. This window has various patient information fields and a notepad.
All entries made in the notepad will be added to the patient’s folder once it has been created. After entering notes in the notepad, click Save to save them. If you have all of the biographical information filled out and want to promote the prospective patient into a full patient, click Promote to create a patient folder.
Questions, comments, or a great blog idea brewing? Email us — we're all ears.