Edge Cloud's Image Cache
Published by Michelle Haupt on
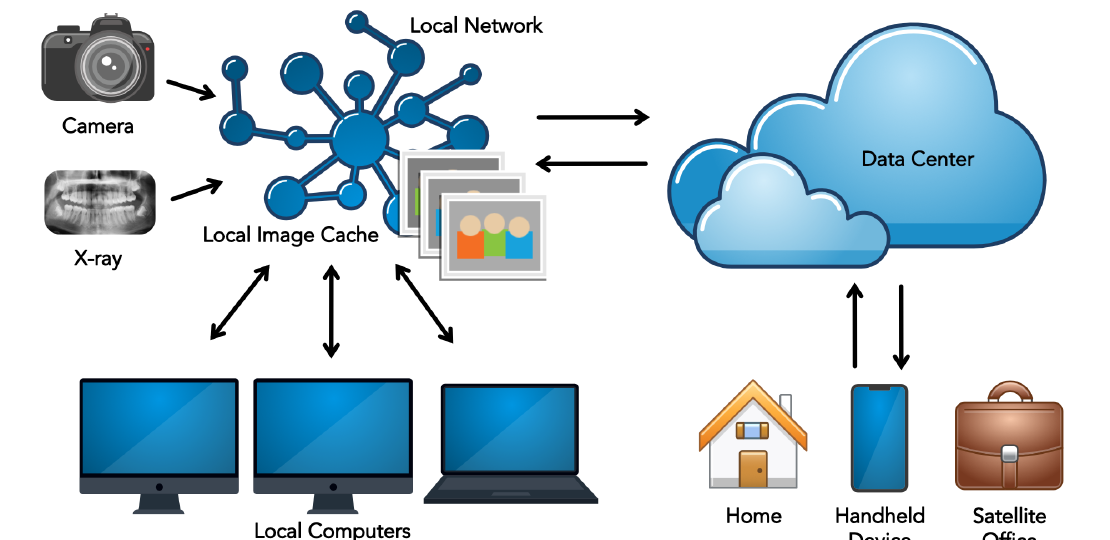
Setting up a local image cache with Edge Cloud means images are available much more quickly. The local image cache is a shared folder on your network that all of your other computers can see and access and houses your images. Your images are still stored in the cloud, but the cache also keeps a local copy of your images on your network.
Every image imported or manipulated in Edge Cloud is sent to our data center while also simultaneously stored in the image cache. This allows instant access to these larger files, without having to download them from the cloud, leaving more Internet speed for data.
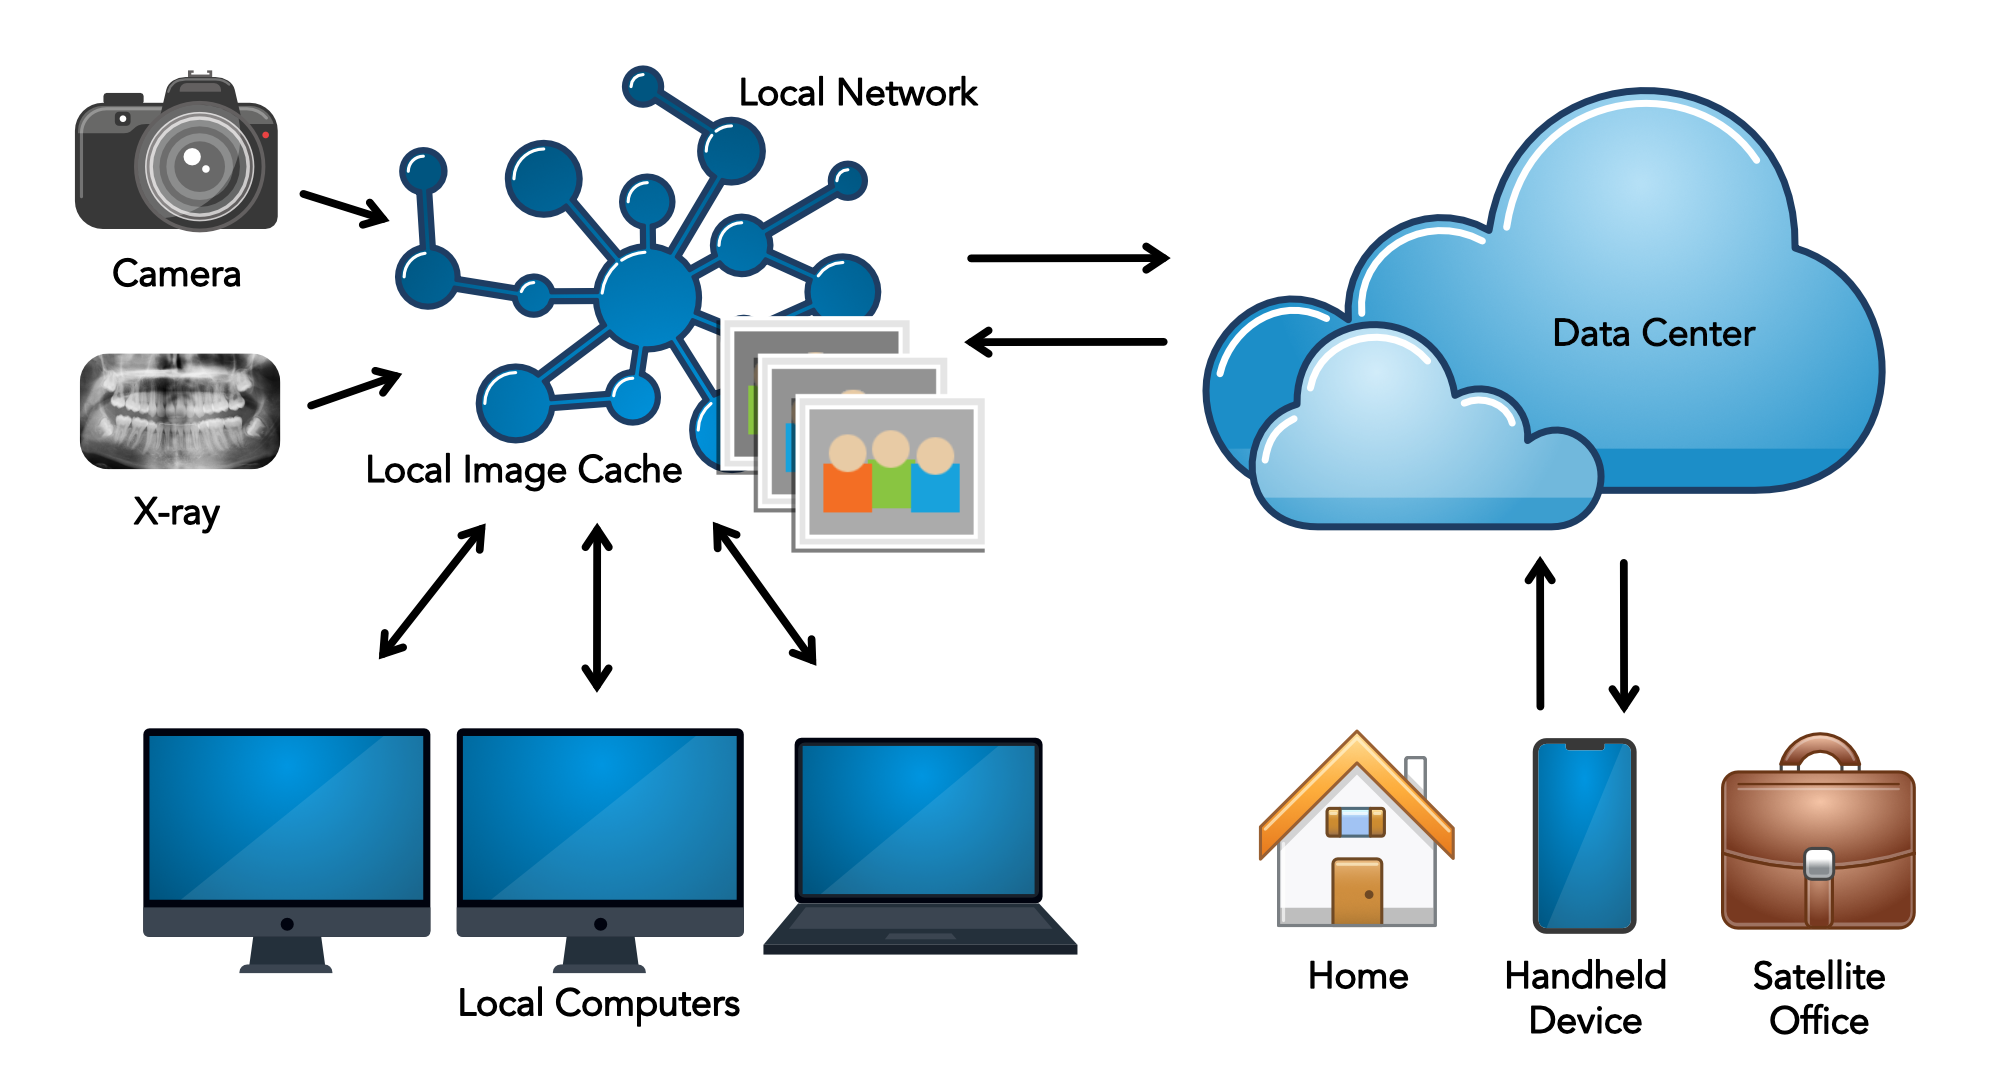
You designate a single computer with ample hard drive space to house the image cache. An imaging directory will be created on this computer and shared with all computers. Each computer with Edge Cloud installed will be linked to the image cache.
The next time you open an image, Edge Cloud automatically checks to see if the most current image is stored in the image cache. If it is, the image will be opened from there instead of being downloaded from the data center. If it is not (because you last manipulated the image from home or a satellite office) Edge Cloud will begin downloading the new image from the data center while also storing it in the local image cache.
It is beneficial in almost all instances to have an image cache set up. However, we don’t recommend setting up an image cache if you use a laptop or computer that travels from office to office. When a computer is at a location where the image cache path won’t work, it can cause slowness.
Setting Up Your Image Cache
Not sure if you have an image cache set up? In Edge Cloud, click User Options in the Tools tab of the Home ribbon bar, then click Imaging. The top setting in this window is your Image Cache Path. If there is a path in there, then you have one set up. It is possible to have an image cache set up on some computers and not on others, so be sure to check all machines in your office.
If you don’t have an image cache in place, the first thing you need to do is create a shared folder on your network that all your computers can access. If you have several office locations, it is best to set up a separate cache for each location, even, and especially, if you have a VPN. After the folder is created, there are two ways to direct your computer to the image cache.
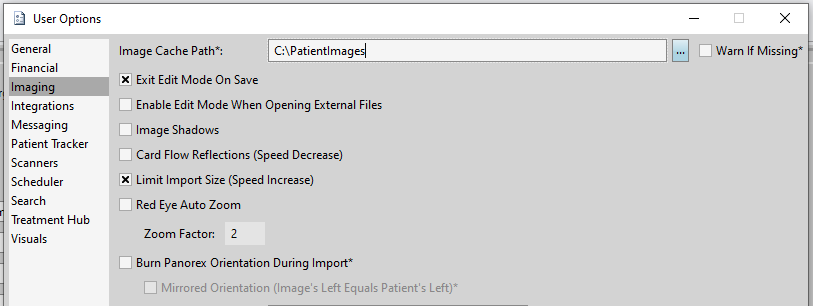
The first way is to click User Options in the Tools tab of the Home ribbon bar, then click Imaging. Click the … button in the Image Cache Path to navigate to the shared folder that you have created. If you choose to set up the image cache this way, you will need to do so on each machine.
The second way is to go to the Tools Tab of the Home ribbon bar and click Editors > Imaging > Image General. On the bottom of this page, you can set an image cache path that will auto-populate to every computer the next time that computer logs in to Edge Cloud.
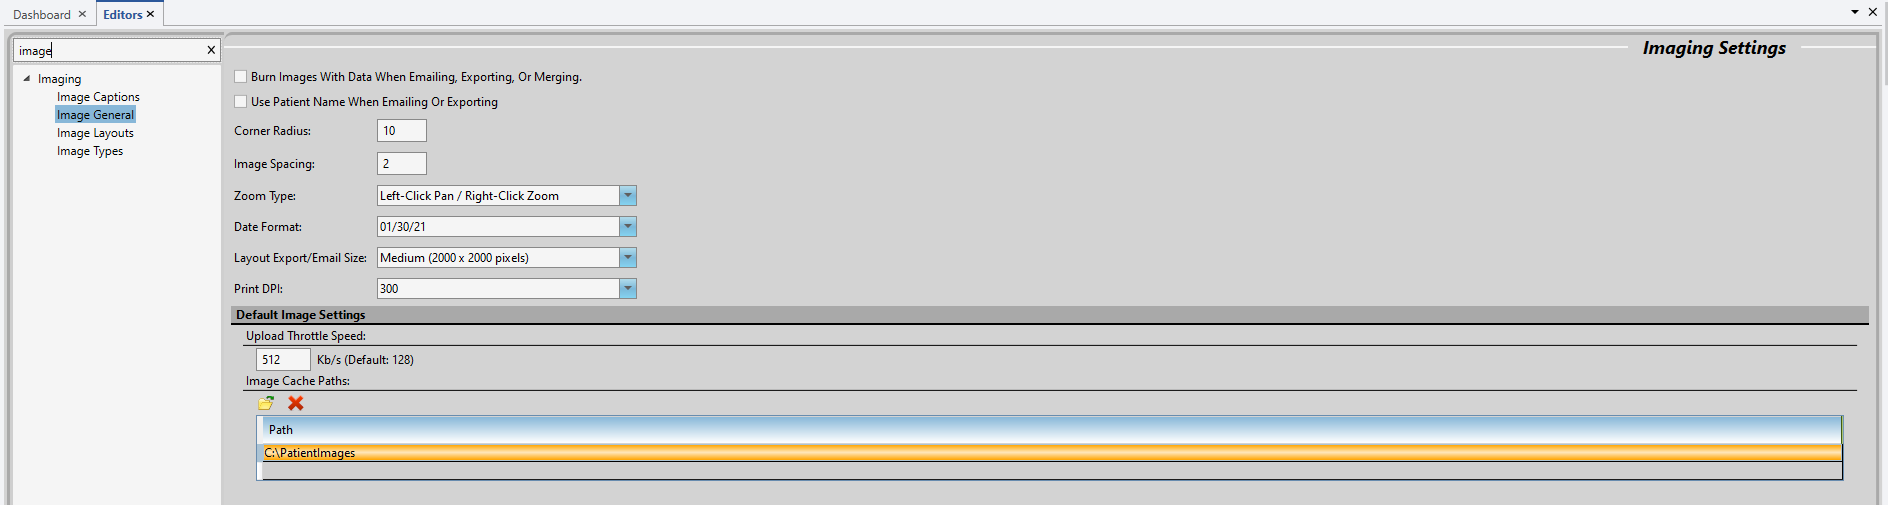
If you do take a laptop from location to location, and you want to use the image cache for each specific location, you can create several image cache paths and set the hierarchy for how Edge Cloud tries to access them. Edge Cloud tries to access each cache in the order it shows up on this list. If it can’t find the first one, it will try to find the second, and so on and so forth.
Tips for Choosing a Computer to Put Your Image Cache On
- A computer that is always on or is the first computer that is turned on each day.
- A computer with a large hard drive with plenty of free space. While the size of the cache will vary widely from practice to practice, and you can always delete images in the cache to create space, a good rule of thumb is to have at least 100-200 GB of free space on the hard drive for the computer that hosts the image cache.
- A NAS can be used but turn off extra features like data scrubbing as it can drastically slow down performance.
- Use a computer that is on a wired network.
- If applicable make sure power management is turned off on the NIC. In the Power Options setting, ensure the hard drive does not turn off and the computer doesn’t hibernate or go to sleep.
- In Services, make sure function discovery provider host and function discover resource publication are set to run automatically.
- Set the IP to a static IP address.
- Make sure the firewall allows other computers to access the share.
- Make sure Network Discovery is turned on.
Tips for a Good Network
- Any chance you have to run a cable, do so. Wireless networks are improving, but cable is still faster.
- Check the status of your NIC. If it is a wired NIC and it is running less than 1.0 Gbps (for example 100 Mbps) then your internal network is running at 1/10 of the speed that it could. This means that there is an outdated piece of networking equipment that is slowing down your network; it could be an old cable, switch, or even a router.
- Test that your computers can access the image cache from the other workstations. Go to Run from your start menu, type \”Name of Computer that is Hosting Image Cache”, and hit enter. It should pop up a file explorer window that shows everything that is shared from that computer. If it pops up a window asking for network credentials, or a window saying that Windows cannot access that computer, then the image cache won’t work. With the first one, you can enter network credentials and gain access. However, these credentials can often get lost after a reboot.
- If you are running a workgroup, make sure all the computers are on the same workgroup and that they are on a private network.
- If using a wireless router keep it in a central location, away from other wireless devices, and don’t put it directly next to a wall if possible.
If you have questions about the image cache, contact the Network Engineering Team at engineering@ortho2.com or 800.346.4504.
Questions, comments, or a great blog idea brewing? Email us — we're all ears.