Top 4 Workflow Uses
Published by Michelle Haupt on
Workflows are a way to automate your system in Edge Cloud. You can change a patient’s status, merge letters, add patients to stacks, and even open the patient’s treatment chart when you seat a patient. Most workflows are procedure-based, meaning something is happening to the patient’s appointment. You can also create workflows based on status changes and other triggers – the possibilities are almost endless.
Status Changes
The most common workflows offices use are status changes. You can change the status to retention on a kept debond appointment, or even display a prompt to the front desk to choose a status when they process your new patient exam as kept. Status workflows are often used to clean up statuses. For example, when a records appointment is made, you know that the patient should be in the records status, and that change happens automatically in the background.
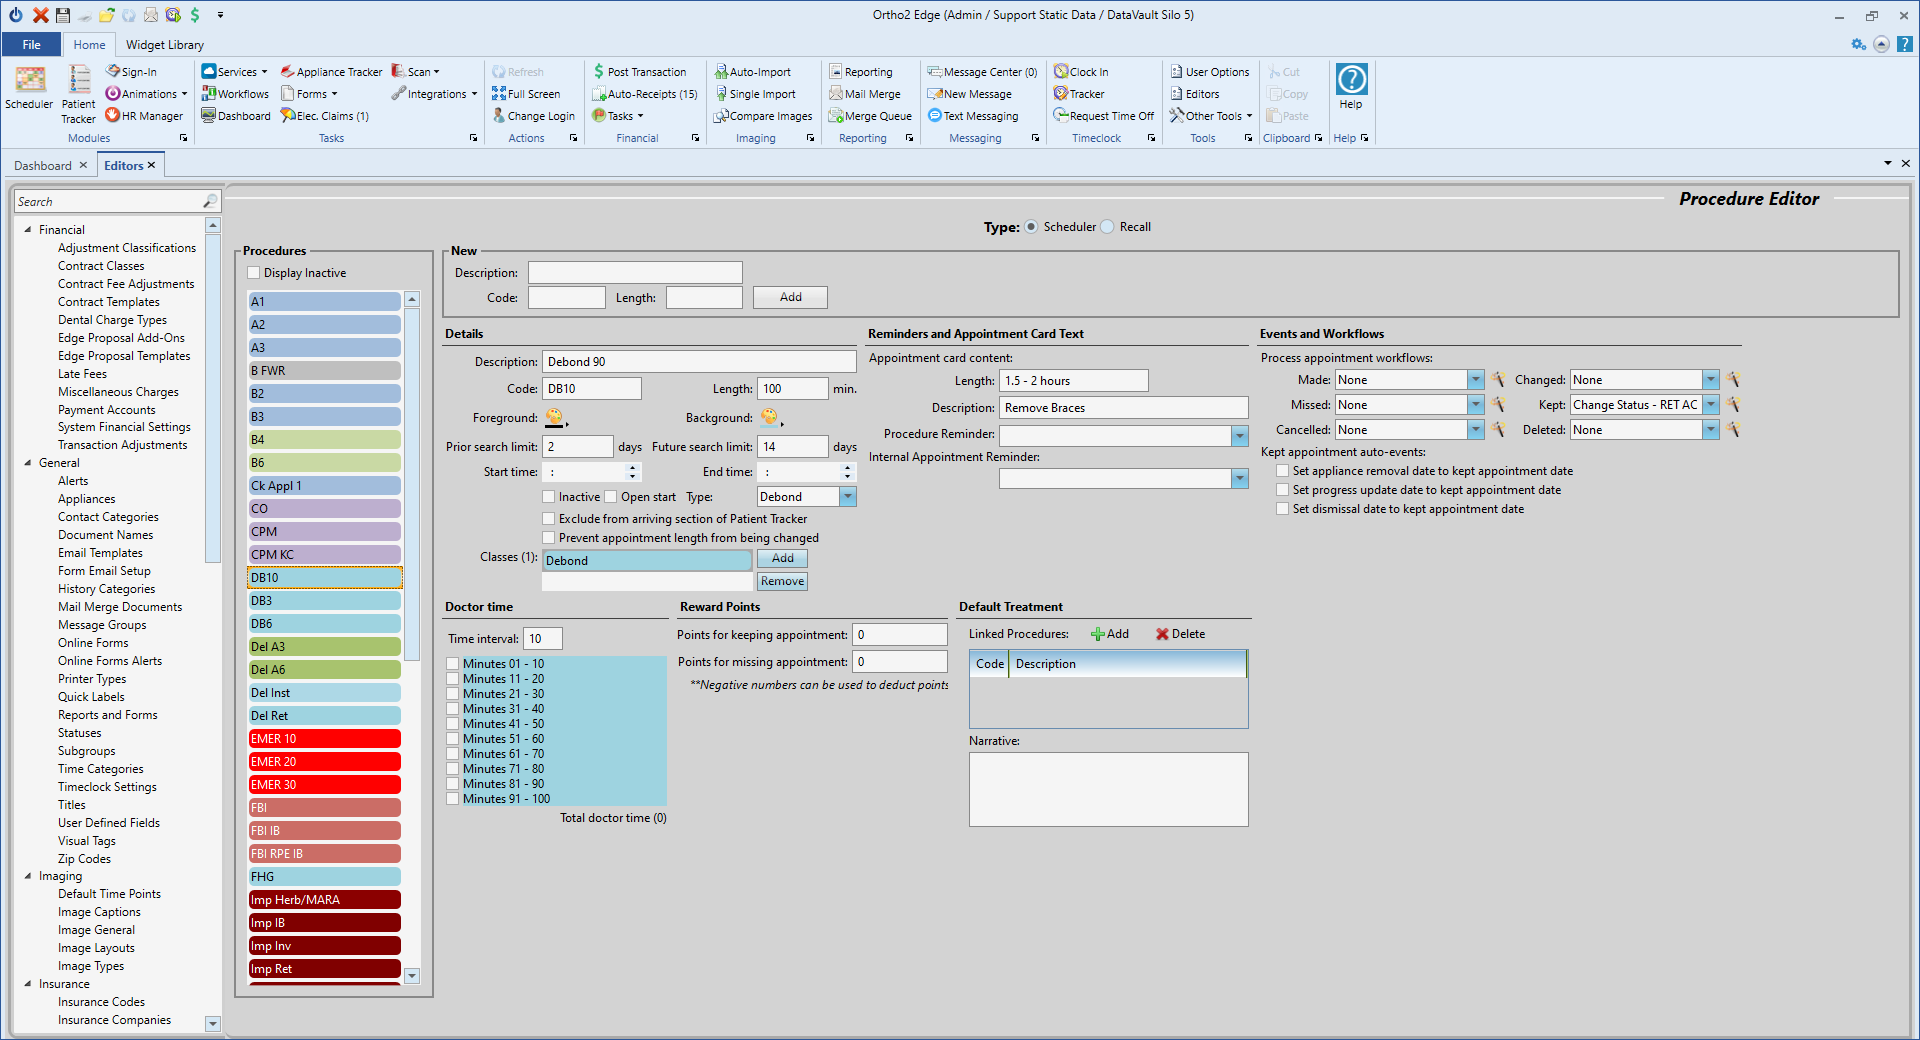
To create a status change workflow, go into the Editors, and find Procedures under Scheduling in the list on the left. Once logged in, find your debond appointment and click on the wizard icon to the right of Kept under the Events and Workflows heading. Click on the Activity drop-down and choose Change Status. In the New Status drop-down, choose your retention status and click OK. In the drop-down list for Kept, and all other types, you will now see Change Status – Retention.
If you want Edge to prompt you to choose a status to change the patient into, follow these same steps, but in the New Status drop-down, choose none. When you click OK, you will now have a workflow called Change Status – Prompt.
Merging Letters
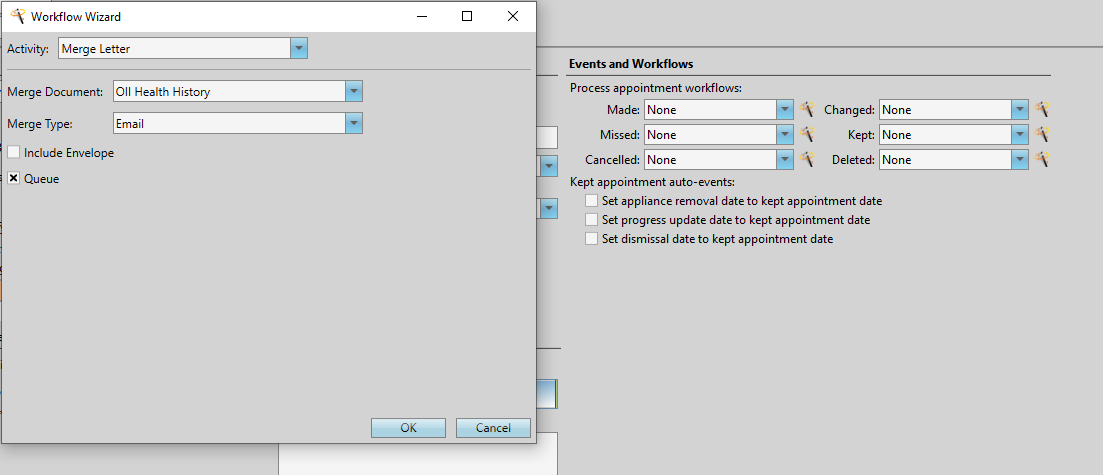
Merging a letter is the next most common workflow and is set up in a similar way as changing a patient’s status. In the Editors, select Procedures from the list on the left under Scheduling. Once logged in, choose the procedure you want to work with. Select the wizard icon next to the appointment status you want to work with. In the Activity drop-down, choose Merge Letter. This will then give you additional options to pick the letter, select your merge type, include an envelope, and, if you want to, send it to the queue. Once you click OK, when you click on the drop-down next to the status you are working with, you will see your new workflow called Merge Letter – Letter Name. Select it, and you are done.
Bonus: You can also combine workflows, for example, to change a patient’s status and merge a letter. Because this workflow is going to do more than one thing at a time, we need to go to a different screen to create it. In the Editors click on Workflows under the Workflows heading. On this screen, we can manually create workflows without the wizard or use the wizard to add to an existing workflow.
To begin, click on New. At the top of the screen, change New Workflow 1 to the name of your new workflow. When you’re doing multiple activities, give the workflow a name based on how it’s used. In this example, call it Exam Kept. The easiest way to create this workflow is to click on the wizard icon that has the green plus sign next to it. Choose the Change Status activity and select the appropriate status. When you’re done, simply click on the same wizard icon with the green plus sign and set up the letter. Your workflow now has two activities. Once you click save in the top left corner, this workflow will be available to use in the Procedures Editor.
Stacks
If you use stacks in Edge Cloud, you can automate the process of sending a patient to a stack using workflows. Let’s say that every time you process a records appointment, you want to send the patient to a stack for insurance verification. As long as the stack name already exists, this is easy to set up. Choose your procedure in the Procedures editor and click on the wizard icon next to the status you want to work with. In the Activity drop-down, choose New Stack Entry. You will then see a list of all of the current stacks in your list. Choose the stack you want to add these patients to and click OK. It’s that easy. You now have a workflow called New Stack Entry – Stack Name to use.
Opening a Treatment Chart when Seating a Patient
Opening a patient’s treatment chart when you seat the patient is another common workflow. You will need to use the computer by the chair the patient is seated in for this workflow to function properly. To set this workflow up, you will again need to use the Workflows Editor.
In the Workflows Editor, click on New at the top and give your workflow a name. In this example, I am going to call it Open Treatment Chart. In the middle of the screen, you’ll see the list of activities. Simply click and drag the Open Patient activity over to the empty Workflow Activities box to the right of it. If you drag the wrong item over, simply press delete on the keyboard to remove it.
Once Open Patient is in the middle of the screen, click on it so it displays the Activities Properties. On the right side of the screen, you will now see an option that says TabToOpen. Click on the drop-down to the right of it and choose Tx. Hub. Save it and the workflow is created.

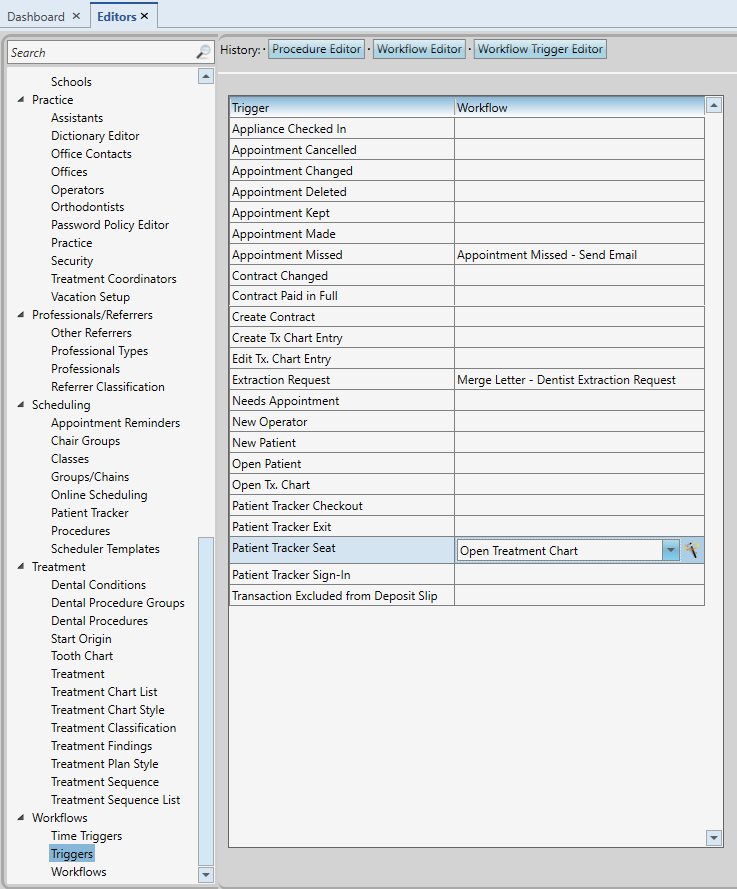
Next, we need to set up the workflow, so it fires every time we seat a patient. To do this, we need to go to the Triggers Editor. This is at the bottom of the Editors list to the left. In here, you will see a list of Triggers that you can run a Workflow with. The Triggers are used to fire a Workflow every time a certain event happens, such as every time you seat a patient, each time you process ANY appointment as Missed, or any time a contract is changed.
Click on the empty box to the right of Patient Tracker Seat. Click again on the drop down that just showed up and select Open Treatment Chart. If this option isn’t available, make sure you save your workflow in the previous step. Click save. It’s just that easy and it’s all set up.
These are just a few examples of what you can do with the powerful workflow function. If you would like to learn more about workflows or see a video on how to set them up, watch our Visual Help video found at support.ortho2.com.
Edge Cloud, Workflows, Stacks, Merge Letters, Treatment Chart, Practice Management Software, Cloud Practice Management, Orthodontics
Questions, comments, or a great blog idea brewing? Email us — we're all ears.

