Setting Up Edge Reminders Messages and Scheduled Reminders
Published by Michelle Haupt on
One of the best features of Edge Reminders is being able to set up and automate your messages. While these are typically set up during your training, we wanted to remind you of the steps so you can change your reminders at any time. After you set up your Edge Reminders messages, you’ll then be able to schedule them to go out in the future.
Set Up Edge Reminders Messages
Use the Reminders editor to create and edit the Edge Reminders messages you send via email and text message. To create or update telephone voice messages, fill out the Custom Project form at support.ortho2.com > Forms/Requests > Requests > Custom Project.
To open the Reminders editor, select Editors from the Tools section of the Home ribbon bar. Then, from the Integrations section, open the Reminders editor.
Choose the Edge Reminders plug in, and confirm the Active setting is enabled. All Edge Reminders set up options are then available to you.
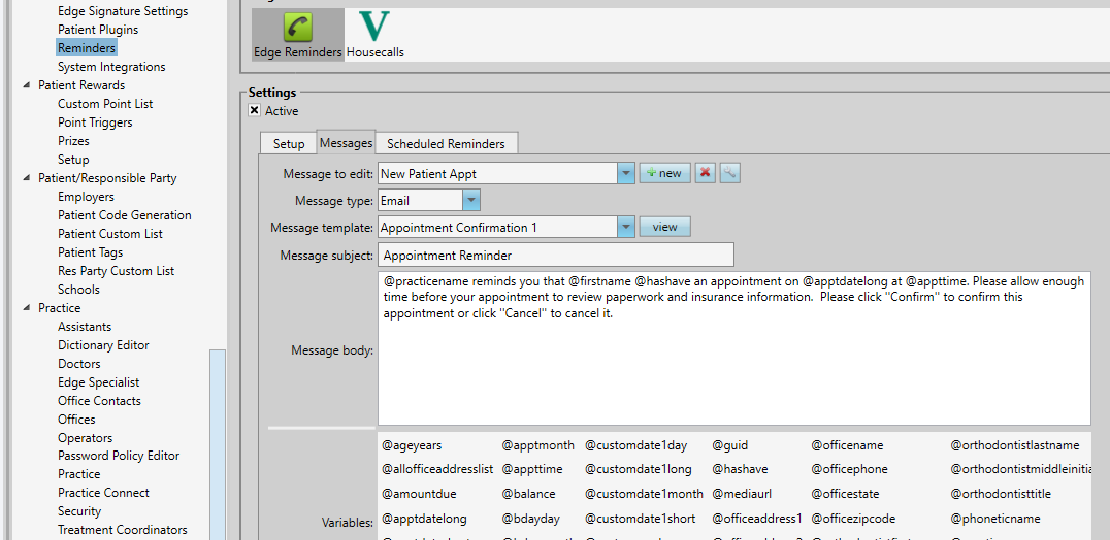
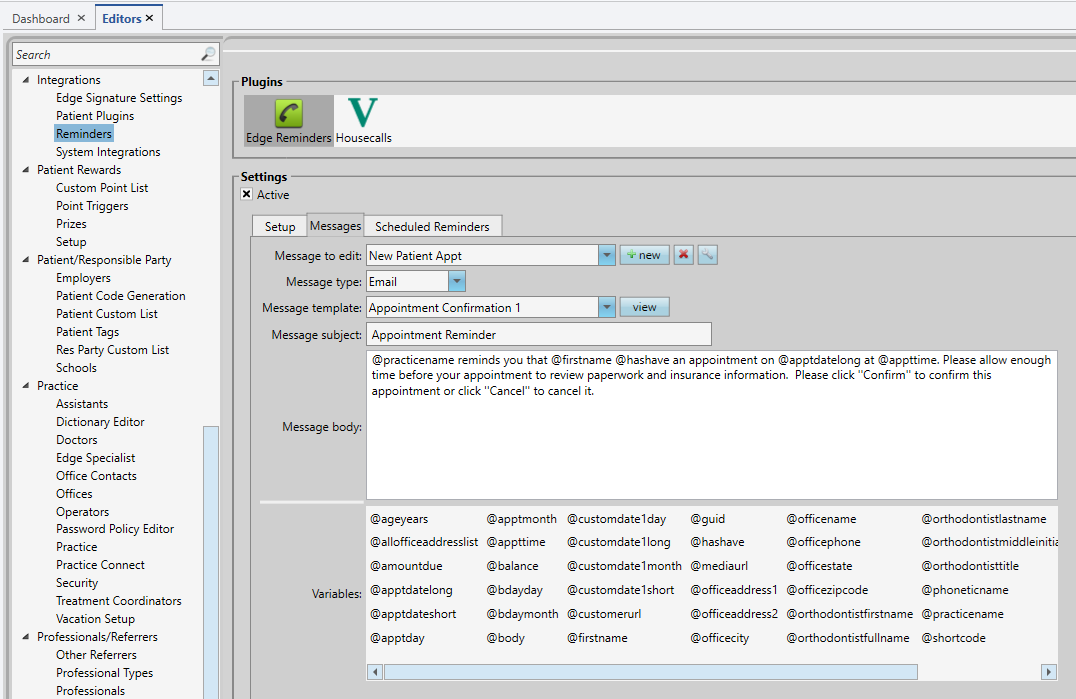
Use the Messages tab to create or edit emails and text messages. To create a new message, click New. Or, use the dropdown list to select an existing message to work with.
After clicking New to create a new message, type a description that makes it easy to determine who it is intended for. Select Appointment Message if you want everyone with an appointment on a specific date to receive the message, or select Responsible Party Message if you want to be able to send the message to a subgroup of patient folders, such as messages regarding birthday greetings or missed appointments. Click Ok.
Message Type: Choose whether this message will be sent via email or text message.
Message Template: (Email messages only.) Select from a list of message templates. Unless otherwise specified in the template name, your email reminders will include buttons for confirming or canceling the appointment, as well as links for opening your web site or a map to your office. If you do not want the email to include these interactive options, be sure to select a template name that says the items are excluded.
Preview: (Email messages only.) To preview message templates, click View. You can then review the text and graphics, and click the interactive buttons to view the linked commands. To toggle through template options, you can click Previous/Next, or use the dropdown at the bottom of the window to preview a specific template. When you are happy with the template you have selected, click Update.
Message Subject and Body: Type or edit the message in the Message Body box. Email messages also have a Message Subject text box.
To add or remove a variable from the message body, simply drag and drop the variable from the list at the bottom of the window into your message.
Keep text messages as short as possible: Some patients may have cell phones that allow a maximum of 150 characters per message. Save all changes when you are done.
Create as many reminder messages as needed. Once you are finished, you can now schedule these messages to be sent.
Scheduling Edge Reminders
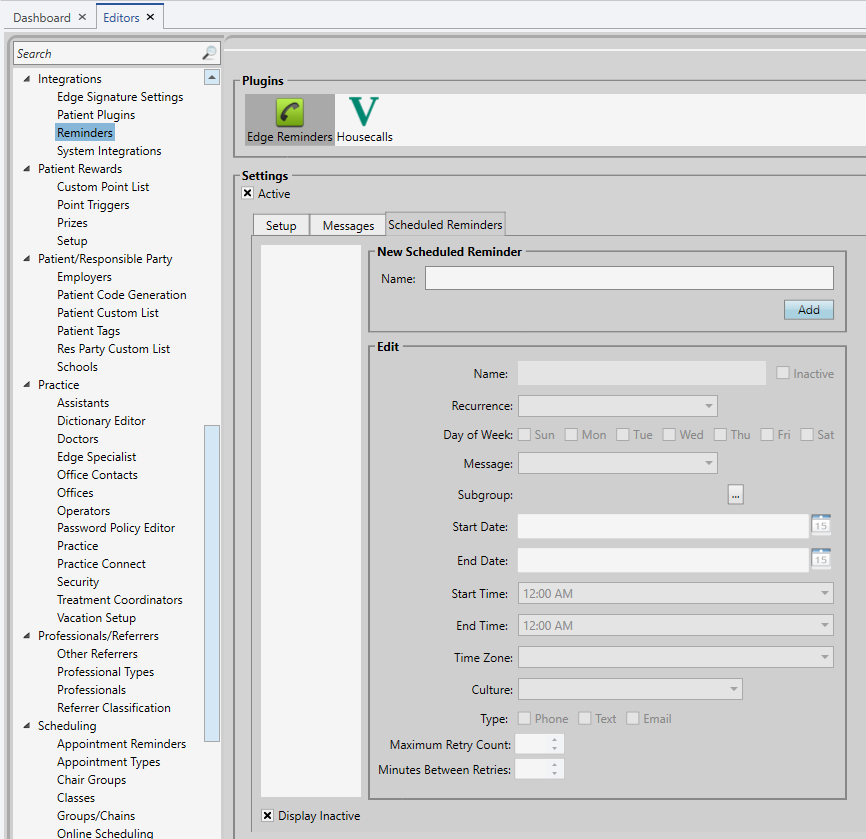
Use the Scheduled Reminders tab of your Reminders editor to schedule recurring messages, such as daily appointment reminders, and weekly birthday messages.
In the New Scheduled Reminder field, enter a description for the new reminder. Click Add to then edit your record to complete the details. In the Edit section, fill in the following fields:
Name: Use a descriptive name for your scheduled reminder.
Recurrence: Select how often you want the reminders to be sent: Daily, Weekly, Monthly, etc.
Day of Week: If you select the Daily recurrence, enable each day of the week that you want the reminders to be run (generally weekdays).
Message: Choose the message to send when this reminder is run.
Choose Subgroup: Select the subgroup to use when selecting who should receive the message. Only records that fit your selected subgroup will be included.
Start Date/End Date: Enter the first date, and optionally the last date that you want the scheduled reminder to be activated. If you want the reminder to recur for an undetermined length of time, leave the end date blank.
Start Time/End Time: Enter the starting and ending times for sending the reminder messages. Message delivery will be attempted only during the time of day you set.
Time Zone: Select your time zone from the drop down list to be sure the messages are delivered at the appropriate local time.
Culture: Select the format to use for the date and time, according to the standardized culture settings for your area.
Type: Enable each type of delivery method, telephone, email, and/or text, that you want to use for this set of reminders.
Retries: Select the maximum number of retries, and minutes between retries, for telephone messages. These fields, which are operator-specific, are ignored for email and text messages. These fields override the values on the Setup tab of the Reminders editor.
After you are finished making your selections, save your changes.
Orthodontic Practice Management, Orthodontics, Edge Reminders, Reminders, Scheduled Reminders, Reminder Message Sets
Questions, comments, or a great blog idea brewing? Email us — we're all ears.