Workflows: Visual Tags and Appliance Tracking
Published by Michelle Haupt on
By Derek Dohrman
In the previous newsletter, we went over how to trigger a workflow from a Treatment Chart entry. We set up automatic status changes on a pre-Treatment Chart entry and gave another example of automating the process of adding appliances to the Appliance Tracker. This time, we will take appliance tracking to a whole new level, adding visual tags into the mix.
Imagine this: based on a Treatment Chart entry, the appliance gets added into the Appliance Tracker automatically. It has the appliance name, the lab, the estimated turnaround time, and life is good. But what if we took that a step further by letting the front desk know where the appliance is without ever leaving the schedule? We can add a visual tag once the appliance is sent, indicating it has been shipped. Once the appliance has been checked in using the Appliance Tracker, that visual tag can be removed and updated with a new one for appliance received. Once the appointment is kept, all appliance visual tags can be removed as they are no longer needed. Pretty cool, right?
With the visual tag workflow, released with Edge Cloud 8.0, this dream can now be a reality. I cannot wait to see what other visual tags people automate with workflows, as the possibilities are endless!
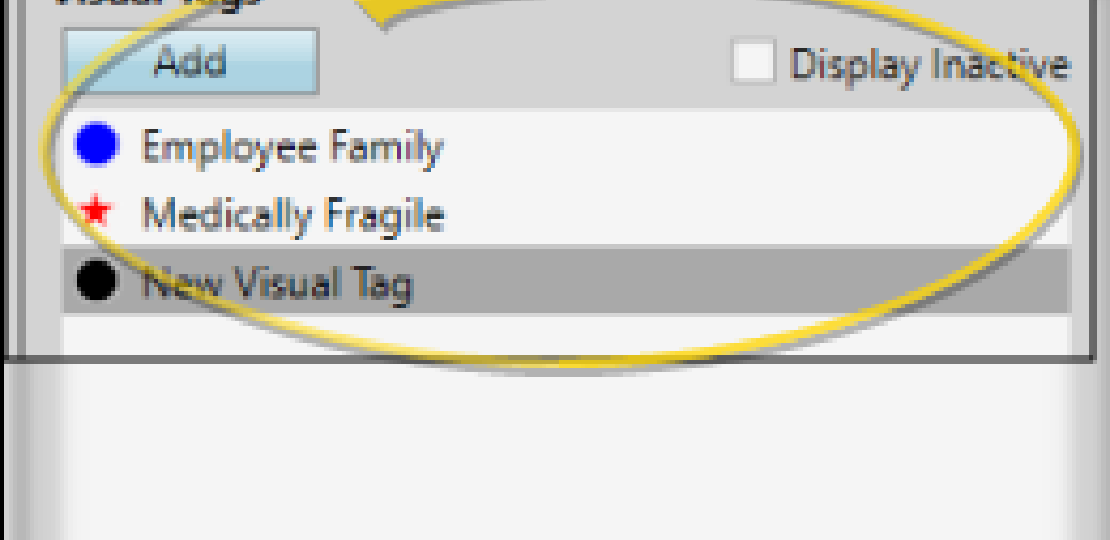
To get started, let’s first create some new visual tags. Go to Editors > Visual Tags. Click Add and create a new visual tag for Appliance Sent and Appliance Received. I recommend using the same Style but changing the color on each.
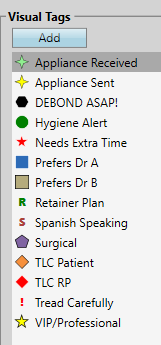
While in this editor, if you have other visual tags you want to add, now’s the time. This screenshot shows some examples of visual tags other offices have used. Make sure to click Save when you’re done.
Pro Tip: You are not limited to the icons you see in the dropdown menu. Selecting Character allows you to type letters. Want more icons? Go to the Windows Start Menu and type Character Map. This will bring up the Windows Character Map, where you can search for other icons like arrows or hearts. Not everything works from the Character Map, but it adds a lot more options!
Next, we need to update the existing appliance workflows we created in part one of this newsletter series. Start by going to Editors > Workflows. Click on one of the existing Appliance Workflows. Click on the green + wand icon to add a new Activity to the existing workflow. For the Activity, choose Add Visual Tag, then choose Appliance Sent. Click Ok. Do this on each of the appliance workflows you have created in the past that are tied to Treatment Chart entries.
The last workflow we need to make will remove the Appliance Sent visual tag and, at the same time, add the Appliance Received visual tag. In the Workflow Editor, click New again and call this workflow Appliance Received. Click the green + wand icon and choose the Activity Remove Visual Tag. Select the Visual Tag Appliance Sent. Click Ok and then the green + wand icon again. Choose the Activity Add Visual Tag, and then Appliance Received. Save the editor.
Now that our workflows are created, let’s go to Editors > Appliances. If you need to update the list of appliances or destinations, click New under each one and update your lists as needed. You can also remove unused items by clicking Inactive in both lists.
Let’s add the workflow we created to every appliance in the list. To the right of each appliance, in the Received Workflow column, click in the box and add Appliance Received from the dropdown. Then click Save once all are marked as Appliance Received.
At this point, Edge Cloud will automatically add the visual tag when the appliance is added in the Treatment Hub and when the appliance is received. However, we don’t want the Appliance Received visual tag to be on the patient’s chart forever, as it will no longer matter after the appointment is over. The last thing we need to set up is one last workflow to remove the Appliance Received visual tag once the appointment has been kept.
Go to Editors > Procedures or Appointment Types for the Edge Specialist users. Note, this Editor has changed with the release of Edge 8.0 to add some additional functionality, so if it doesn’t look familiar anymore, that’s ok. It’s the same editor as before. Select an appointment where you will be delivering an appliance. Click on the new Events and Workflows Tab. Next to Kept, it should say None. If it doesn’t, write down the name of this workflow, so we can update it in the Workflow editor.
If it says None, click on the wand icon to the right of kept. Select the Activity Remove Visual Tag and choose the Appliance Received visual tag. Click Ok. Kept will now say Remove Visual Tag – Appliance Received. Select the next appointment we want to add this workflow to. This time, we don’t need to use the wand because the workflow already exists. Click on the dropdown to the right of Kept and choose Remove Visual Tag – Appliance Received. Save it when you’re done with each appointment code.
If you wrote down the names of any workflows next to Kept in the previous step, we will need to update those existing workflows manually. Go to Editors > Workflows. Select the name of the workflow you wrote down and hit the green + wand icon to add a new activity to the existing workflow. Select the Activity Remove Visual Tag and choose Appliance Received. Click Ok. Do this for each workflow you wrote down and click Save.
Congratulations! You’ve now unlocked some new, powerful automations within Edge Cloud 8.0 that will hopefully make everyone’s lives easier. As always, if you have any questions about setting up workflows, feel free to reach out to the Software Support Team.
Derek Dohrman, Ortho2 Advanced Tech & Lead Trainer, has worked at Ortho2 for 20 years and has done countless on-site and remote trainings. He enjoys playing video and board games, traveling, and keeping up with new computer technology.
Questions, comments, or a great blog idea brewing? Email us — we're all ears.